Manage Platform.sh environments
Back to home
On this page
A Platform.sh environment contains one instance of an app (or group of apps) with all the services needed for it to run.
Each project can include multiple environments, often divided into environment types. If you have a live site, you have at least a production environment. You may also have additional environments of the Staging or Development environment type, but there will only ever be one production environment.
You can think of other environments as copies of your live site where you can run tests without worrying about damaging anything in production. Once you have completed your tests, you can merge your changes so that they’re instantly and seamlessly deployed to production.
You can create environments for development, testing, staging, review, and so on. To organize your environments, you can create hierarchical relationships.
Create environments 
You can create new environments in one of two ways:
-
Push a local branch through Git or a source integration.
When you branch an environment, you might want to create exact replicas of it. In this case, each new environment inherits all of the data and services from its parent environment. This includes databases, network storage, queues, and routing configurations.
You can create Platform.sh environments on demand. Each environment is tied to a Git branch. If you use a source integration, you can even have environments created automatically for your pull requests and branches.
You can also have branches that aren’t tied to a running instance of your application. These are called inactive environments.
Note
Application containers on created preview environments default to a size of Standard. This behavior can be modified by those with manage plans permission to increase Environments application size.
Default environment
Your default environment comes from your default branch and is a production environment. Your project must have a default environment, but you can name it as you want.
If you subscribed to a production plan, this environment is your live site. You might want to give it a custom domain name.
Environment status
Your environments can have one of three statuses:
-
Active: A deployed environment with services and data.
-
Inactive: An environment that isn’t deployed and has no services or data, only code.
-
Paused: An environment that hasn’t been redeployed in 14 days or longer.
You can see the status of your environments in the Console or the CLI.
When you open your project, inactive environments appear lighter in the environment list. You also can’t select them from the Environment dropdown menu.
To check the status of an environment, you can also open it and view its information panel.
platform environments command.You can change an environment’s status at any time.
Organize your environments
Hierarchy
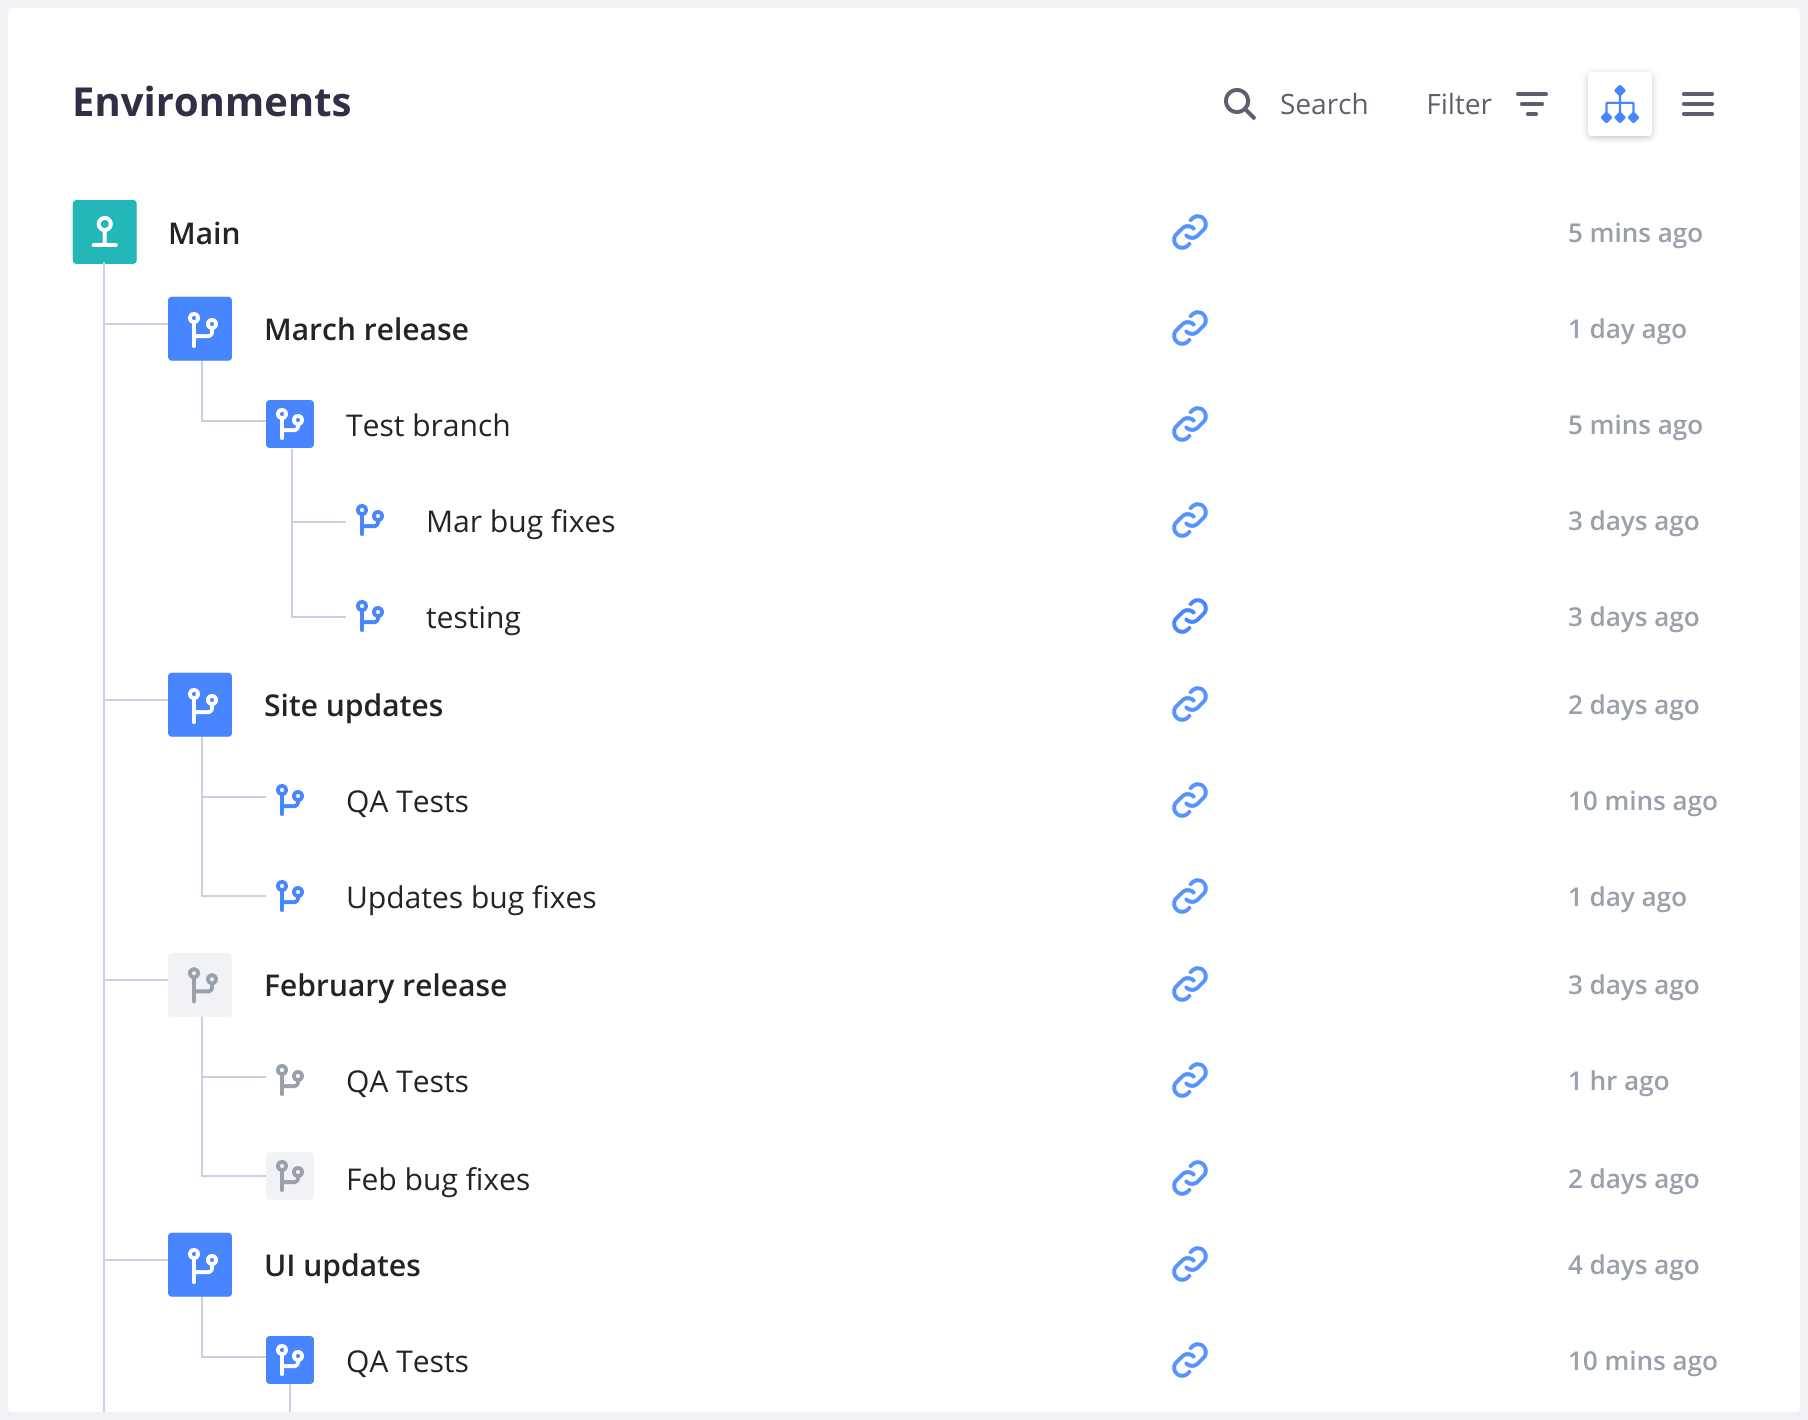
In Platform.sh, your environments are organized in a hierarchy featuring parent and child environments.
When you branch an environment, the parent of the new environment is the environment it was created from. You can change the environment’s parent after it’s been created.
When you push a branch through Git or a source integration, the parent environment of the new environment is your default environment. Alternatively, you can change the environment’s parent after it’s been created.
Each child environment can sync code and/or data down from its parent and merge code up to its parent. You can use child environments for development, staging, and testing.
Workflows
Since you can customize your environment hierarchy, you can create your own workflows. You can decide which structure best fits your needs.
Possible approaches
You may want to take one of the following approaches when creating your workflows:
-
Agile: A child environment per sprint. Each story in the sprint can have its own environment as a child of the sprint environment.
-
Developer-centric: One QA environment and a few preview environments (per developer, per task, or similar).
-
Testing: An operational test environment, a user test environment, and a few unit test environments.
-
Hotfix: One environment for each bug, security issue, or hotfix that needs deployment.
Example workflow
Example Agile workflow:
-
An admin branches the Live (default) environment to create a Sprint environment.
-
The admin gives each developer permission to branch the Sprint environment to create new feature environments.

-
Feature 1 is developed and work is reviewed by accessing the deployed Feature 1 environment.
-
When the review is done, Feature 1 is merged into the Sprint environment.

-
The remaining features sync with the Sprint environment. This ensures their working environment is up-to-date with the latest code.

-
When the sprint is complete and all features merged into the Sprint environment, the admin makes a backup of the live site.
-
The admin merges the Sprint environment into the Live environment.

-
The admin syncs the next sprint’s environment with the Live environment to repeat and continue the development process.

Naming conventions
You can organize and work with your preview environments in many different ways. It can help to introduce a convention for how you name and structure your environments.
For each environment, choose a name that represents what the environment is for. If you use Agile, for example, you can adopt a naming convention similar to the following:
Live
  Sprint1
    Feature1
    Feature2
    Feature3
  Sprint2
    Feature1
    Feature2
If you prefer splitting your environments per developer and having a specific environment for each task or ticket, you can adopt a naming convention similar to the following:
Staging
  Developer1
    Ticket-526
    Ticket-593
  Developer2
    Ticket-395
Paused environments
Preview environments are often used for a limited time and then abandoned. To prevent unnecessary consumption of resources, Platform.sh automatically pauses preview environments (of both development and staging types) that haven’t been redeployed in 14 days.
Note
If you’re on a development plan, all your environments are preview environments that can be paused automatically. This includes your future production environment. To prevent your production environment from being paused automatically, upgrade to a non-development plan.
You can pause (and resume) an environment manually at any time.
Pause an environment
To pause an environment, follow these steps:
Run the following command:
platform environment:pause --project PROJECT_ID --environment ENVIRONMENT_NAME- Navigate to your project and click Settings.
- Under Environments, select the environment you want to pause.
- In the Status tab, click Pause environment.
Resume a paused environment
Pushing new code or redeploying a paused environment automatically resumes it. You can also resume it manually at any time.
Run the following command:
platform environment:resume --project PROJECT_ID --environment ENVIRONMENT_NAME- Navigate to the paused environment.
- In the Activity tab, click Resume environment.
- In the Resume environment window, click Resume.
The environment is redeployed and becomes available for use again.
Push options
Git provides push options to pass a string to the server (see the official Git documentation).
Platform.sh supports some of these push options, which allows you to push changes to your environment and trigger the following actions at the same time:
| Action | Command |
|---|---|
| Activate the environment | git push platform -o "environment.status=active" |
| Set a title for the environment | git push platform -o "environment.title=<ENVIRONMENT_TITLE>" |
| Set the parent environment | git push platform -o "environment.parent=<PARENT_ENVIRONMENT_NAME>" |
| Clone the data from the parent environment | git push platform -o "environment.clone_parent_on_create=True" |
| Disable the cloning of the data from the parent environment | git push platform -o "environment.clone_parent_on_create=False" |
Set the environment type (development, staging, or production) |
git push platform -o "environment.type=<ENVIRONMENT_TYPE>" |
If your remote location isn’t named platform,
make sure you adjust the commands accordingly.
Note
You can’t use push options if you have a source integration set up.
The following example shows how, through a single push,
you can activate your environment, set a title for it,
set a parent environment for it, and clone the data from its parent into it.
git push platform -o "environment.status=active" -o "environment.title=my-environment-title" -o "environment.parent=my-parent-environment" -o "environment.clone_parent_on_create=True"